
Abstract
Once the Android SDK is installed, the Android emulator is running, and your development environment is set up to your liking, there is still one frustration ahead: the Android emulator can be extremely slow. Especially when testing and debugging larger applications, the emulator’s speed is a noticeable bottleneck in development. The best solution to this is the Intel Hardware Accelerated Execution Manager (Intel HAXM) with Intel Virtualization Technology (Intel VT).
You have full access to this open access chapter, Download chapter PDF
Keywords
These keywords were added by machine and not by the authors. This process is experimental and the keywords may be updated as the learning algorithm improves.
I do not fear computers. I fear the lack of them.
—Isaac Asimov
Once the Android SDK is installed, the Android emulator is running, and your development environment is set up to your liking, there is still one frustration ahead: the Android emulator can be extremely slow. Especially when testing and debugging larger applications, the emulator’s speed is a noticeable bottleneck in development. The best solution to this is the Intel Hardware Accelerated Execution Manager (Intel HAXM) with Intel Virtualization Technology (Intel VT). If your development system uses one of the supported Intel processors, this hardware-assisted virtualization engine, or hypervisor, will enable lightning-fast Android emulation.
Introduction
This software:
-
Uses Intel VT, available on select Intel processors.
-
Provides hardware-accelerated emulation of Intel x86 Android virtual devices.
-
Integrates with the Android SDK.
-
Intel HAXM requires the Android SDK to be installed (version 17 or higher). For best performance, using SDK version 2.0 or higher is recommended.
-
Recent Windows or Mac OS X (32/64-bit).
As an important note, Intel HAXM cannot be used on systems without an Intel processor nor an Intel processor without the required hardware features. To determine the capabilities of your Intel processor, please visit http://ark.intel.com/. Additionally, Intel HAXM can only accelerate Android x86 system images for emulator x86. HAXM has been validated with x86 system images provided by Intel at http://www.intel.com/software/android.
Downloading Intel HAXM
Intel HAXM can be installed either through the Android SDK Manager (recommended), or manually, by downloading the installer from Intel’s web site.
Note
Intel HAXM does not automatically check for updates. To get the latest version, download the Intel HAXM package using the Android SDK Manager (recommended) or from the Intel Software Network Android developer site.
Downloading Through Android SDK Manager
-
1.
Start the Android SDK Manager.
-
2.
Under Extras, check the box next to Intel x86 Emulator Accelerator (HAXM), as seen in Figure 11-1.

Downloading the Intel x86 Emulator Accelerator (HAXM)
-
3.
Click the Install Package button.
-
4.
Review the Intel Corporation license agreement. If you accept the terms, select Accept and click Install.
-
5.
The SDK Manager will download the installer to the Tools directory, under the main SDK directory.
-
6.
Extract the installer inside the Tools directory and follow the installation instructions for your platform.
Downloading Manually
- 1.
-
2.
Choose the Intel HAXM installer package for your platform.
-
3.
Extract the installer and follow the installation instructions for your platform.
Installing Intel HAXM on Windows
Warning
Intel HAXM installation will fail if your system does not meet the system requirements, including support for Intel processor features, such as Intel Virtualization Technology (Intel VT).
-
1.
Download the installer package from http://www.intel.com/software/android or by using the SDK manager.
-
2.
Run the installer (and accept the UAC prompt, if applicable).
-
3.
If an older version Intel HAXM is installed, you will see something like Figure 11-2.
Figure 11-2. 
Notification Dialog
-
4.
Click Yes to upgrade Intel HAXM, or click No to exit the installation and keep the currently installed version of Intel HAXM.
-
5.
You will see a screen like Figure 11-3.
Figure 11-3. 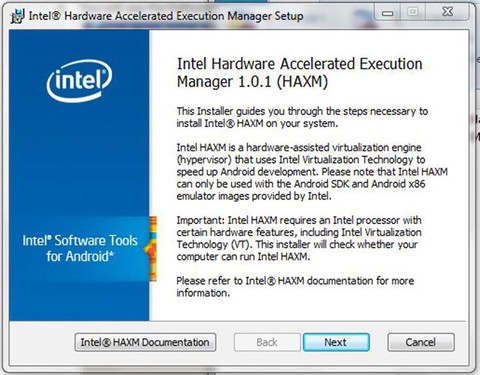
HAXM Installation Screen


Note
You can access the documentation at any time by clicking Intel HAXM documentation.
-
6.
Click Next.
-
7.
Read the Intel HAXM End-User License Agreement (EULA) and, if you agree, accept the EULA and continue installing Intel HAXM.
-
8.
You will be prompted to adjust the amount of RAM allocated to Intel HAXM, as shown in Figure 11-4.
Figure 11-4. 
HAXM RAM Adjustment Screen

Note
The installer also functions as a configuration tool for IntelzHAXM. To change your memory settings, run the installer again.
-
9.
Figure 11-5 confirms your Intel HAXM memory allocation settings.
Figure 11-5. 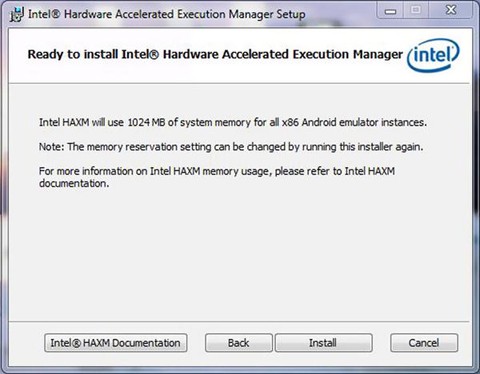
Intel HAXM Ready to Install

-
10.
When the Intel HAXM installation is finished, click Finish to exit the installer.
Intel HAXM is now installed and ready to use. To verify that Intel HAXM is running, open a command prompt window and execute the following command:
sc query
intelhaxm
If Intel HAXM is working, the command will show a status message indicating that the state is 4 RUNNING.
To stop Intel HAXM, use these commands:
sc stop
intelhaxm
To start Intel HAXM, use these commands:
sc start
intelhaxm
Adjusting Intel HAXM Memory Allocation
To change the amount of memory allocated to Intel HAXM, run the installer again.
Note
Changes to Intel HAXM memory settings will take effect when Intel HAXM is restarted. Currently running emulators will continue to use the previous memory setting.
Intel Virtualization Technology (Intel VT-x) Capability
When installing Intel HAXM, you may encounter an error regarding Intel VT-x support. This error message can be triggered by the following conditions:
-
Intel VT-x is not supported by your computer’s processor.
-
Intel VT-x is not enabled.
Intel VT-x Is Not Supported
Intel HAXM requires an Intel processor with Intel VT-x functionality and cannot be used on systems lacking this hardware feature. To determine the capabilities of your Intel processor, visit http://ark.intel.com/.
Intel VT-x Is Not Enabled
In some cases, Intel VT-x may be disabled in the system BIOS and must be enabled within the BIOS setup utility. To access the BIOS setup utility, you press a certain key during the computer’s boot sequence. This key is dependent on which BIOS is used, but it is typically F2, Delete, or the Esc key. Within the BIOS setup utility, Intel VT may be identified by the terms “VT,” “Virtualization Technology,” or “VT-d.” Make sure to enable all of the virtualization features. For specific information on entering BIOS setup and enabling Intel VT, contact your hardware manufacturer.
Tips and Tricks
The following list contains some recommendations to get the best experience out of the Android emulator using the Intel HAXM driver:
-
Enable the GPU acceleration in the AVD Manager for your image. The HAXM driver executes most CPU instructions natively through Intel Virtualization Technology in the processor and the GPU acceleration offloads the OpenGL calls to the host GPU. As of SDK release 19, the GPU acceleration is considered “experimental” by Google.
-
Launch the emulator from the command line to get more verbose output.
-
Use the following command to launch the emulator:
emulator-x86 –avd <avd name> -partition-size 1024 –gpu on –verbose
-
A partition size of 1024 allows 1GB of apps to be installed. This is different from the SDCard size option in the AVD manager, which specifies how much storage for storing media files is allotted inside of the emulator. Setting the GPU to on will provide better graphics performance.
-
Make sure the Path environment variable to the GPU emulation libraries is set in Control Panel ➤ System ➤ Advanced System Settings ➤ Environment Variables. You can also set it manually each time a new command prompt is launched. Setting it manually is recommended if you are using multiple SDK installs. The following <sdk install location> typically refers to:
"c:\Users\<your username>\android-sdk" set PATH=%PATH%;<sdk install location>\tools\lib
-
When installing Intel HAXM, set the driver to use half of the available RAM in the system. For example, if your system has 6GB of installed memory, then use 3GB for the Intel HAXM driver. This allows for a good balance of memory for the HAXM driver as compared to the system memory.
-
When creating the image, don’t set the Device RAM Size option larger than the amount of RAM allocated to the Intel HAXM driver. In the previous example, the Device RAM Size should not be larger than 3GB since only 3GB were allocated to Intel HAXM.
-
The maximum memory for the Intel HAXM driver that can be chosen for a 32-bit system is 1.6 GB. For a 64-bit system, the maximum is 8GB.
Sometimes, when booting an image for the first time, it will appear to be hung at the boot screen. The boot process is completed, but the home screen doesn’t appear. Click on the Home button on the emulator to show the home screen.
Mac OS
-
1.
Download the installer package from http://www.intel.com/software/android or by using the SDK Manager.
-
2.
Open the DMG fil e, then run the installer contained inside.
-
3.
If an older version Intel HAXM is installed, you will see a notification dialog. Click OK to dismiss the dialog. Then you can either exit the installer, to keep your current version of Intel HAXM, or continue with the installation and upgrade your version of Intel HAXM.
-
4.
You will see a welcome screen, like Figure 11-6.
Figure 11-6. 
Intel HAXM Welcome Screen on Mac OS
-
5.
Click Continue.
-
6.
Read the Intel HAXM End-User License Agreement (EULA) and, if you agree, accept the EULA and continue installing Intel HAXM.
-
7.
You will be prompted to adjust the amount of RAM that will be allocated to Intel HAXM, as shown in Figure 11-7.
Figure 11-7. 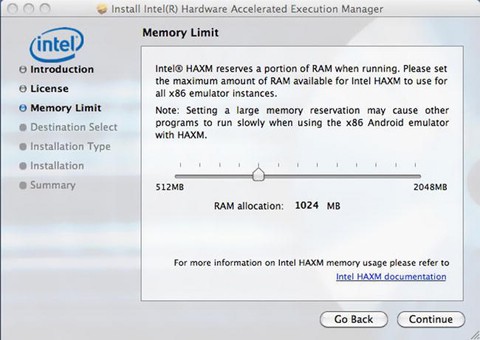
Intel HAXM RAM Adjustment Screen on Mac OS


-
8.
Figure 11-8 confirms your Intel HAXM memory allocation settings.
Figure 11-8. 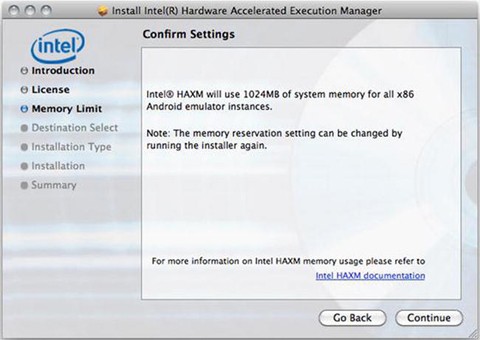
Intel HAXM Finish Screen on Mac OS
-
9.
Select the drive where Intel HAXM will be installed, then click Continue.
-
10.
Once Intel HAXM is installed, click Close to exit the installer.
-
11.
Intel H AXM is now installed and ready to use.

To verify that Intel HAXM is running, open a terminal window and execute the following command:
kextstat | grep
intel
If Intel HAXM is operating correctly, the command will show a status message indicating that the kernel extension named com.intel.kext.intelhaxm is loaded.
To stop Intel HAXM, use the following commands:
sudo kextunload -b
com.intel.kext.intelhaxm
To start Intel HAXM, use the following commands:
sudo kextload -b
com.intel.kext.intelhaxm
Adjusting Intel HAXM Memory Allocation
To change the amount of memory allocated to Intel HAXM, run the installer again.
Note
Changes to Intel HAXM memory settings will take effect when Intel HAXM is restarted. Currently running emulators will continue to use the previous memory setting.
Removing Intel HAXM
To uninstall Intel HAXM, open a terminal window and execute this command:
sudo
/System/Library/Extensions/intelhaxm.kext/Contents/Resources/uninstall.sh
You will be prompted for your current user password. Follow the uninstaller prompts to remove Intel HAXM.
Important
Removing Intel HAXM will disable acceleration of all Intel x86 Android emulators. Existing Android virtual devices will continue to function, but will no longer be accelerated. Installing Intel HAXM again will re-enable Android emulator acceleration.
Troubleshooting
Intel HAXM requires an Android x86 system image provided by Intel. You can download these images through the Android SDK manager or manually from the Intel Developer Zone web site.
Intel Execute Disable (XD) Bit Capability Error
When installing Intel HAXM, you may encounter an error regarding Intel XD support.
This error message can be triggered by the following conditions:
-
Intel XD is not supported by your computer’s processor.
-
Intel XD is not enabled.
Intel XD Is Not Supported
Intel HAXM requires an Intel processor with Execute Disable (XD) bit functionality and cannot be used on systems lacking this hardware feature. To determine the capabilities of your Intel processor, visit http://ark.intel.com/ .
Intel XD Is Not Enabled
Note
Apple computers have Intel XD permanently enabled if supported by the processor.
If you receive an error message indicating that Intel XD is not enabled, your computer does not meet the minimum system requirements to use Intel HAXM. To determine the capabilities of your Intel processor, visit http://ark.intel.com/.
Intel Virtualization Technology (VT-x) Capability
When installing Intel HAXM, you may encounter an error regarding Intel VT-x support.
This error message can be triggered by the following conditions:
-
Intel VT-x is not supported by your computer’s processor.
-
Intel VT-x is not enabled.
Intel VT-x Is Not Supported
Intel HAXM requires an Intel processor with Intel VT-x functionality and cannot be used on systems lacking this hardware feature. To determine the capabilities of your Intel processor, visit http://ark.intel.com/ .
Intel VT-x Is Not Enabled
Note
Apple computers have Intel VT-x permanently enabled if supported by the processor.
If you receive an error message indicating that Intel VT is not enabled, your computer does not meet the minimum system requirements to use Intel HAXM. To determine the capabilities of your Intel processor, visit http://ark.intel.com/.
Tips and Tricks
The following list contains recommendations to get the best experience out of the Android emulator using the Intel HAXM driver:
-
Enable the GPU acceleration in the AVD manager for your image. The Intel HAXM driver executes most CPU instructions natively through the Intel Virtualization Technology in the processor and the GPU acceleration offloads the OpenGL calls to the host GPU.
-
Use the following command in the terminal to launch the emulator:
./emulator-x86 –avd <avd name> -partition-size 1024 –gpu on
-
A partition-size of 1024 allows 1GB of apps to be installed. This is different from the SDCard size option in the AVD manager, which specifies how much storage for storing media files is allotted inside of the emulator. Setting the GPU to on will provide better graphics performance.
-
Make sure that the environment variables for the GL libraries are set correctly. Set the LD_LIBRARY_PATH variable by using the following command in the terminal. Modify the command to point to your SDK installation.
export LD_LIBRARY_PATH=<sdk install location>/tools/lib
-
To automatically run this command whenever a new terminal is started, you can add this command to your ∼/.bash_profile script.
-
When installing Intel HAXM, set the driver to use half of the available RAM in the system. For example, if your system has 6GB of installed memory, then use 3GB for the Intel HAXM driver. This allows a good balance of memory for the Intel HAXM driver as compared to the system memory.
-
When creating the image, don’t set the Device RAM Size option larger than the amount of RAM allocated to the Intel HAXM driver. In the previous example, the device RAM size should not be larger than 3GB since only 3GB were allocated to Intel HAXM.
-
The maximum memory for the Intel HAXM driver on a 32-bit system is 1.6GB. For a 64-bit system, the maximum is 8GB.
-
Sometimes, when booting an image for the first time, it will appear to be hung at the boot screen. The boot process is completed but the home screen doesn’t appear. Click on the Home button on the emulator to show the home screen.
Linux
Since Google mainly supports Android builds on the Linux platform, and a lot of Android developers are using AVD on Eclipse hosted by a Linux system, it is critical that Android developers take advantage of Intel hardware-assisted KVM virtualization for Linux just like Intel HAXM for Windows and IOS. To enable KVM on the Ubuntu host platform and to begin using the Intel Android x86 emulator with Intel hardware-assisted virtualization (hypervisor), use the following steps.
KVM Installation
The first step is to install the required KVM by following the instructions from the Ubuntu community page ( https://help.ubuntu.com/community/KVM/Installation ). To check if your system’s processor supports hardware virtualization, use this command:
$ egrep -c '(vmx|svm)' /proc/cpuinfo
If the output is 0, it means that your CPU doesn’t support hardware virtualization.
The next step is to install the CPU checker:
$ sudo apt-get install cpu-checker
Now you can check if your CPU supports KVM by issuing the following command:
$kvm-ok
If you see this message:
"INFO: Your CPU supports KVM extensions
INFO: /dev/kvm exists
KVM acceleration can be used"
It means you can run your virtual machine faster with the KVM extensions.
However, if you see this:
"INFO: KVM is disabled by your BIOS
HINT: Enter your BIOS setup and enable Virtualization Technology (VT),
and then hard poweroff/poweron your system
KVM acceleration can NOT be used"
You need to go to the BIOS setup and enable Intel VT.
Install KVM
For Ubuntu Lucid (10.04) or later, use the following command:
$ sudo apt-get install qemu-kvm libvirt-bin ubuntu-vm-builder bridge-utils
Next, add your <username> account to the kvm and libvirtd groups:
$ sudo adduser your_user_name kvm
$ sudo adduser your_user_name libvirtd
After the installation, you need to log in again so that your user account becomes an effective member of the kvm and libvirtd user groups. The members of these groups can run virtual machines. You can verify that your installation has been successful with the following command:
$ sudo virsh -c qemu:///system list
Your screen will paint the following if the installation was successful:
Id Name State
Start the AVD from Android SDK Directly from Terminal
Now start the Android for x86 Intel emulator, shown in Figure 11-9, using the following command:

Intel HAXM on Linux
$ <SDK directory>/tools/emulator-x86 -avd Your_AVD_Name -qemu -m 2047 -enable-kvm
Only a 64-bit Ubuntu can allow you to run allocated memory of 2GB or more. My 64-bit Ubuntu has 6GB of memory, so I used one third of it for Android AVD. My AVD named Intel_Atom_gingerbread_2.3. '-qemu' provides the options to qemu, and the -m specifies the amount of memory for the emulated Android (that is, guest). If you use too small a value for that, it’s possible that performance will suffer because of frequent swapping activities. Add -show-kernel to see the message from the kernel.
Start the AVD by AVD Manager in Eclipse
The following procedures are recommended by Google. If you are running the emulator from Eclipse, run your Android application with an x86-based AVD and include the KVM options:
-
1.
In Eclipse, click your Android project folder and then select Run ➤ Run Configurations.
-
2.
In the left panel of the Run Configurations dialog, select your Android project to run a configuration or to create a new configuration.
-
3.
Click the Target tab.
-
4.
Select the x86-based AVD you created previously.
-
5.
In the Additional Emulator Command-Line Options field, enter:
-qemu -m 2047 -enable-kvm
-
6.
Run your Android project using this run configuration.
Overview
This chapter covered the installation of the Intel Hardware Accelerated Execution Manager (Intel HAXM) with Intel Virtualization Technology (Intel VT). These tools provide you with the fastest and most efficient all-around experience as an Android x86 developer. This chapter included sections specific to each major operating system—Windows, Mac OS, and Linux. These sections highlighted not only the install process, but also tips and tricks for troubleshooting some common problems.
Author information
Authors and Affiliations
Rights and permissions
Open Access This chapter is licensed under the terms of the Creative Commons Attribution-NonCommercial-NoDerivatives 4.0 International License (http://creativecommons.org/licenses/by-nc-nd/4.0/), which permits any noncommercial use, sharing, distribution and reproduction in any medium or format, as long as you give appropriate credit to the original author(s) and the source, provide a link to the Creative Commons licence and indicate if you modified the licensed material. You do not have permission under this licence to share adapted material derived from this chapter or parts of it.
The images or other third party material in this chapter are included in the chapter’s Creative Commons licence, unless indicated otherwise in a credit line to the material. If material is not included in the chapter’s Creative Commons licence and your intended use is not permitted by statutory regulation or exceeds the permitted use, you will need to obtain permission directly from the copyright holder.
Copyright information
© 2013 Iggy Krajci
About this chapter
Cite this chapter
Krajci, I., Cummings, D. (2013). Using Intel Hardware Accelerated Execution Manager on Windows, Mac OS, and Linux to Speed Up Android on x86 Emulation. In: Android on x86. Apress, Berkeley, CA. https://doi.org/10.1007/978-1-4302-6131-5_11
Download citation
DOI: https://doi.org/10.1007/978-1-4302-6131-5_11
Published:
Publisher Name: Apress, Berkeley, CA
Print ISBN: 978-1-4302-6130-8
Online ISBN: 978-1-4302-6131-5
eBook Packages: Professional and Applied ComputingApress Access BooksProfessional and Applied Computing (R0)