
Abstract
Photographic activity schedules have been demonstrated to be effective in helping individuals with autism and other developmental disabilities learn how to complete both simple and complex sequences of activities without prompting from adults. Although the majority of research studies demonstrating the effectiveness of activity schedules have used schedule books composed of static printed pictures attached to physical pages, recently researchers have begun to demonstrate the effectiveness of technology-based activity schedules. In the current article, we provide a task analysis for creating both simple and complex digital activity schedules using Google Slides, a freely available, web-based technology that operates on a variety of digital platforms. We also provide suggestions for how behavior analysts can train parents to use this technology with their children using telehealth procedures.
A photographic activity schedule is a set of pictures or words that prompts an individual to engage in a sequence of specific behaviors (McClannahan & Krantz, 1999). Researchers have shown activity schedules to be an effective way to teach individuals with disabilities a variety of skills, including independent completion of work tasks (Carson, Gast, & Ayres, 2008), independent solitary play for children with autism (MacDuff, Krantz, & McClannahan, 1993), and both simple and complex social play for children with autism (Akers, Higbee, Gerencser, & Pellegrino, 2018; Betz, Higbee, & Reagon, 2008; Brodhead, Higbee, Pollard, Akers, & Gerencser, 2014). These studies demonstrate that activity schedules promote independence, increase learner engagement with appropriate activities, and decrease reliance on prompts. Therefore, these tools are ideally suited for situations, such as the current COVID-19 crisis, where access to direct, professional-led learning may be reduced and clients may be provided with longer periods of “downtime” than under typical circumstances.
Activity schedules are an attractive tool for promoting independence not only because of their effectiveness but also because of the broad range of individuals with whom they can be used and the wide array of skills they can be used to promote. They require relatively few prerequisite skills and conditions in order to be effective (e.g., picture-object correspondence, acceptance of physical prompts, identified reinforcers) and can be used to teach sequences of behavior as simple as independent play sequences (MacDuff et al., 1993) and as complex as group social games such as hide-and-seek (Akers et al., 2018). Importantly, researchers have demonstrated that parents can be taught, via technology, to implement activity schedule teaching procedures with high degrees of fidelity (Gerencser, Higbee, Akers, & Contreras, 2017).
To date, most activity schedules used in published studies have been composed of three-ring binders with pictures attached to individual pages or strips of pictures on a single page. Although inexpensive, binder- or paper-based schedules may have some disadvantages, such as being cumbersome to transport (Carlile, Reeve, Reeve, & DeBar, 2013) and, perhaps more importantly, potentially socially stigmatizing, as same-aged peers would likely not be carrying around books during activities (Giles & Markham, 2017).
Given technological advances that have made portable electronic devices, such as tablet computers, more readily available to teachers and families of individuals with disabilities, there may be advantages to using digital schedules that could be displayed on these devices. First, scanned or photographic images of activities could be easily moved around within activity schedules, reducing the cost and effort of printing and laminating images for inclusion in binder-based or single-page printed schedules. Second, digital schedules could easily be shared across multiple devices. For example, copies of the schedule could be updated by a teacher or therapist and then e-mailed to a parent for use at home. Finally, tablet computers are now ubiquitous in school, work, and home settings, thus reducing potential stigmatization for digital activity schedule users.
Multiple researchers have investigated the effectiveness of various forms of digital activity schedules delivered on electronic devices, including computers running Microsoft PowerPoint (Rehfeldt, Kinney, Root, & Stromer, 2004), iPods to increase on-task behavior (Carlile et al., 2013), video clips to increase dramatic play (Dauphin, Kinney, & Stromer, 2004), iPads to increase time on task and decrease transition time during centers (Gourwitz, 2014), and iPads to promote completion of leisure activities (Giles & Markham, 2017). One published study has also indicated that, for some participants, digital activity schedules may be preferred over binder-based schedules (Giles & Markham, 2017). Although further research on the use of digital activity schedules is certainly warranted, a sufficient body of research exists to demonstrate the potential benefits of this technology. Given the portability of digital activity schedules and the potential for behavior analysts to be able to design digital activity schedules and transmit them electronically to parents or caregivers for use with their children at home, we believe that they are ideally suited to the current therapeutic environment caused by the COVID-19 pandemic, which limits direct contact between behavior analysts and the clients and families with whom they work. Thus, the purpose of this article is to provide a detailed task analysis that both behavior analysts and parents can use to create and modify digital activity schedules using Google Slides, a freely available, web-based program that works on a variety of digital devices and platforms.
Brief Activity Schedule Primer
Although detailed descriptions of how to create and build independence using activity schedules are available elsewhere (e.g., Higbee & Brodhead, 2016; Higbee & Sellers, 2017; McClannahan & Krantz, 1999), a brief summary of how to select activities for inclusion in a digital activity schedule and standard prompting/teaching techniques is included here. We refer the reader to the cited papers for more detailed descriptions and instructions.
Selecting Activities and Arranging the Environment
Specific activities to be included in a beginning activity schedule, including a digital one, should be moderately preferred, close-ended (i.e., have a clear beginning and end), relatively brief, and already independently performed by the learner, as the focus during initial activity schedule training is on how to follow the schedule rather than on the activities themselves (Higbee & Sellers, 2017). Beginning activity schedules are usually composed of at least two to three activity pages plus a terminal reinforcer page (typically a small amount of a preferred edible) at the end. Additional activities can be added as the learner demonstrates mastery of the schedule to form progressively longer response chains. The sequence of activities should be changed frequently to ensure that the learner’s behavior comes under the control of the pictures displayed as opposed to becoming a sequence of rote behaviors under proprioceptor control of sensations repeated in a performance chain.
Activity schedules can be used in multiple environments. However, beginning play/leisure activity schedules often are used at a table or desk that is large enough to both hold the schedule and provide enough room to complete the activities (the floor could also be used in the absence of a desk or table). Activity materials are typically placed on a shelf near the desk/table. They could also be placed directly on the table if it is large enough to hold all materials and still have a clear work space to complete activities. Alternatively, materials could be placed on the floor near the table. When learners are first beginning to use activity schedules, the idea is to have the materials close at hand to reduce travel time and the potential for distraction. Once learners have mastered the basic components of activity schedule following, materials can be placed in their natural locations.
Sequence of Activity Schedule Following
Learners are taught, through a procedure called “graduated guidance,” described in the next section on prompting procedures, to follow the activity schedule. The following sequence of behaviors constitutes “following the schedule”:
-
1.
Retrieve the schedule (obtain the tablet or other digital device) and place it on the table/floor where activities will be completed.
-
2.
Open the schedule file/program (Steps 1 and 2 may be completed by a parent or teacher for a digital schedule, depending on the learner’s level of familiarity with the technology).
-
3.
Touch the picture of the activity (an observing response).
-
4.
Obtain the materials necessary for completing the activity (e.g., retrieve the pictured puzzle from a shelf).
-
5.
Complete the activity.
-
6.
Return the materials back to their original location.
-
7.
“Turn the page” on the digital schedule to display the next activity by touching or clicking on the arrow in the bottom-right corner of the screen.
-
8.
Repeat Steps 3–7 until reaching the terminal reinforcer page and consuming the reinforcer.
-
9.
Return the digital device to its original location or close the program.
Prompting Procedures and Error Correction
In an effort to reduce dependence on adult-provided verbal prompts and instructions, learners are taught to follow activity schedules exclusively via physical prompts delivered from behind the learner, so as not to block the learner’s view of the relevant visual stimuli that should control their behavior (McClannahan & Krantz, 1999). The only verbal instruction given to the learner should be the initial instruction to begin completing the schedule (e.g., “It’s time to do your activity schedule. Here you go!”). After that, the person assisting the learner to follow the schedule should not provide any additional verbal instructions, verbal prompts, or conversation until the schedule is completed (unless one of the included activities is a social activity during which verbal interaction would be appropriate). The amount of physical prompting provided will depend on each individual learner’s abilities but will often begin with hand-over-hand guidance that should be provided in a way that allows the learner to complete the schedule with as few errors as possible. This physical guidance should be faded as quickly as possible to avoid prompt dependence. A typical fading sequence would begin with hand-over-hand guidance that is progressively faded to physical prompts at the wrist, forearm, elbow, and shoulder, followed by gradually increased physical distance between the prompter and the learner. We have found that light physical prompts from behind at the shoulders are particularly effective for guiding learners back and forth between the schedule and the activity materials. Fading can take place dynamically within sessions or can be scripted across sessions. One practical method for prompt fading that has been particularly useful when parents are the primary implementers is that used by Gerencser et al. (2017), where test sessions are periodically run using a 5-s prompt delay procedure to determine the steps a learner can complete independently. Prompts that the learner needed to complete the task are recorded on a data sheet, which then serves as a teaching guide for sessions until the next test session is conducted (see the Appendix, Fig. 28, for a sample data sheet). Behavior analysts who have the capacity to view sessions live through videoconference technology could also provide parents with fading suggestions in real time.
When learners make errors, the type of error will determine how the implementer/prompter should respond. If the learner begins to drift off task or begins to engage in stereotypy with schedule materials, the implementer/prompter should simply interrupt this behavior and physically redirect the learner to complete the activity correctly. However, if the learner obtains the incorrect materials after touching the picture representing those materials, he or she should be redirected back to the schedule, physically prompted to touch the picture of the materials again, and physically guided to obtain the correct materials. This helps ensure that learner behavior comes under the control of the schedule.
Advanced Activity Schedule Components
Once learners have mastered following basic activity schedules with brief, close-ended activities, more complex activities can be introduced. For example, implementers can add choice pages in which the learner can select from two or more available activities. On a close-ended activity schedule that a learner previously mastered, choice pages could be added to the schedule to replace one or more of the close-ended activities. Learners can also be taught to set and respond to digital timers using visual cues in order to include open-ended activities in the digital schedule. Red circles representing the number of minutes for the activity and a green circle representing the start button are placed below the picture of the open-ended activity. The minute button on the digital timer is also colored red and the start/stop button colored green. The learner is physically prompted to touch each circle below the picture and the corresponding colored button on the timer to set and start the timer. Responding to these more complex activity schedule pages can often be taught via graduated guidance within activity schedule sessions. If a learner requires more practice, modeling and teaching sessions with timers and choice pages could occur outside of activity schedule sessions (Higbee & Sellers, 2017; McClannahan & Krantz, 1999).
Data Collection
Learner performance can be measured by scoring steps from the schedule-following sequence that were performed independently by the learner. A sample data sheet is included in the Appendix, Fig. 28. Whereas collecting data during each teaching session would be ideal during the initial stages of learning, Gerencser et al. (2017) suggest using test sessions that may provide sufficient data to make decisions about prompt levels. An example of the data sheet that is similar to the one used by Gerencser et al. is provided in the Appendix, Fig. 29. Also, when parents are implementing activity schedules, behavior analysts could score performance viewed live through videoconferencing technology or via recorded sessions sent electronically by parents.
Digital Activity Schedule Template Task Analysis
The following task analysis uses the web-based program Google Slides to create digital activity schedules. Google Slides is a freeware program that works on a variety of digital devices and operating systems. More information about Google Slides can be found at https://www.google.com/slides/about/. A flowchart of essential steps in the task analysis is provided in the Appendix, Fig. 30, to guide the reader and assist with troubleshooting.
Creating a Google Slides Presentation
-
1.
Open a web browser and sign in to your Google account.
-
2.
Navigate to https://docs.google.com/presentation.
-
3.
Create a new blank presentation by clicking the multicolored plus sign in the navigation bar near the top of the page.
-
4.
Click “Untitled presentation” in the top-left corner and type “Activity Schedule Template.”
Activity Schedule Setup and Cover (Figure 1)
-
1.
Click “File” and navigate to “Page setup” near the bottom of the list.
-
2.
Resize the page by clicking “Widescreen 16:9.” Select “Custom” and change the dimensions to 5.5 × 8.5 in. Click “Apply.”
-
3.
Click “Background” on the toolbar and select a desired color for the schedule background. Select “Add to theme” and then click “Done.”
-
4.
Select the subtitle text box and press the “Delete” key.
-
5.
Click on the title text box. Blue squares should appear on the text box, as shown in Fig. 2. Resize the title text box by dragging down the bottom-center square to make a large rectangle centered on the page.
-
a.
Google Slides provides red guide lines (Fig. 2) that aid with centering shapes, objects, and so on. These guide lines pop up when an item is centered horizontally and/or vertically within a slide or with adjacent items.
-
a.
-
6.
Select the title text box and change the background to white by clicking the Fill Color icon (Fig. 3).
-
7.
Select “Click to add title” and type “Student’s Name.”
-
8.
While the title text box is selected, click on the Align icon (Fig. 4). Center the text horizontally by clicking the Center icon and vertically by clicking the Middle icon.
-
9.
Select the Shape tool and select the Right Arrow icon, as displayed in Fig. 5. Draw in the bottom-right corner of the page.
-
10.
Double-click on the arrow and type “NEXT” in the center of the arrow. The activity schedule cover should look like Fig. 1.
Fig. 1 
Activity schedule cover
Fig. 2 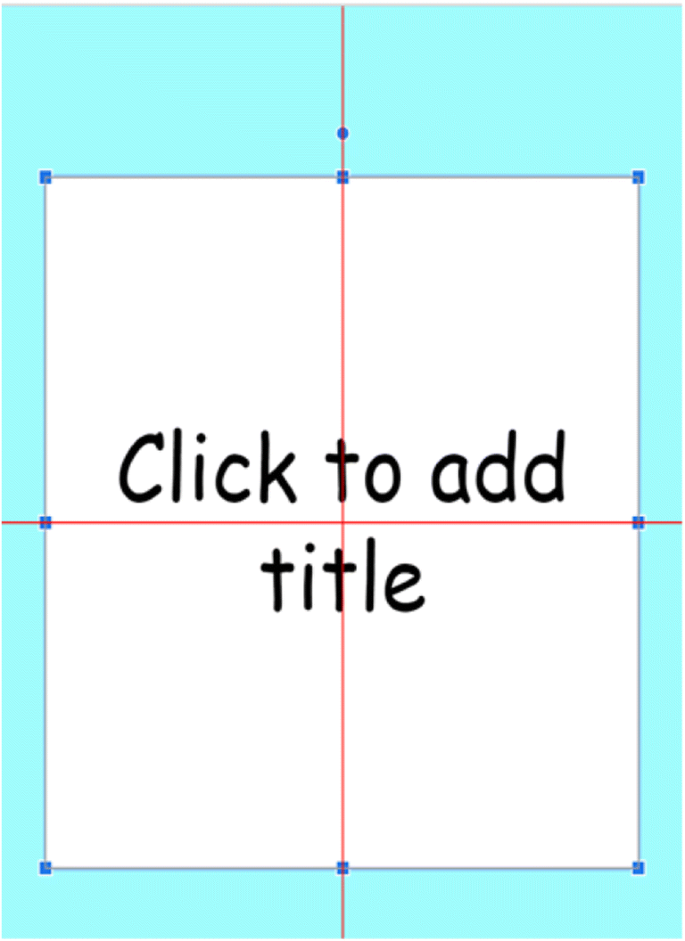
Google Slides editing tools: blue squares to adjust size and red guide lines to center
Fig. 3 
Fill Color icon
Fig. 4 
Formatting tools: Align, Center, and Middle icons
Fig. 5 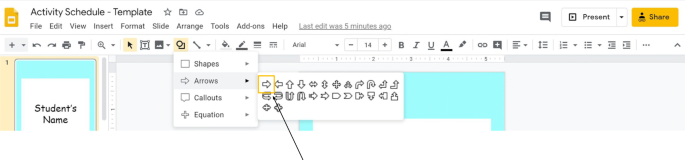
Selecting a right arrow


Creating Close-Ended Activity Pages (Figure 6) and the Terminal Reinforcer Page (Figure 7)
-
1.
Create a new blank page by clicking on the last page in the left column and pressing the “Enter” key.
-
2.
Delete all text boxes.
-
3.
Insert a large white square in the center of the page.
-
4.
Insert a picture of a close-ended activity using the Insert Image icon (see Fig. 8) to import desired pictures of activity schedule toys.
-
5.
Center and resize the picture to fit in the white square area.
-
6.
Repeat Steps 1–5 to create multiple close-ended activity pages and one terminal reinforcer page. The close-ended pages of the activity schedule should look like Fig. 6, and the terminal reinforcer page should look like Fig. 7.
-
7.
After creating all pages in a schedule, move the terminal reinforcer page to the last page in the schedule.
Fig. 6. 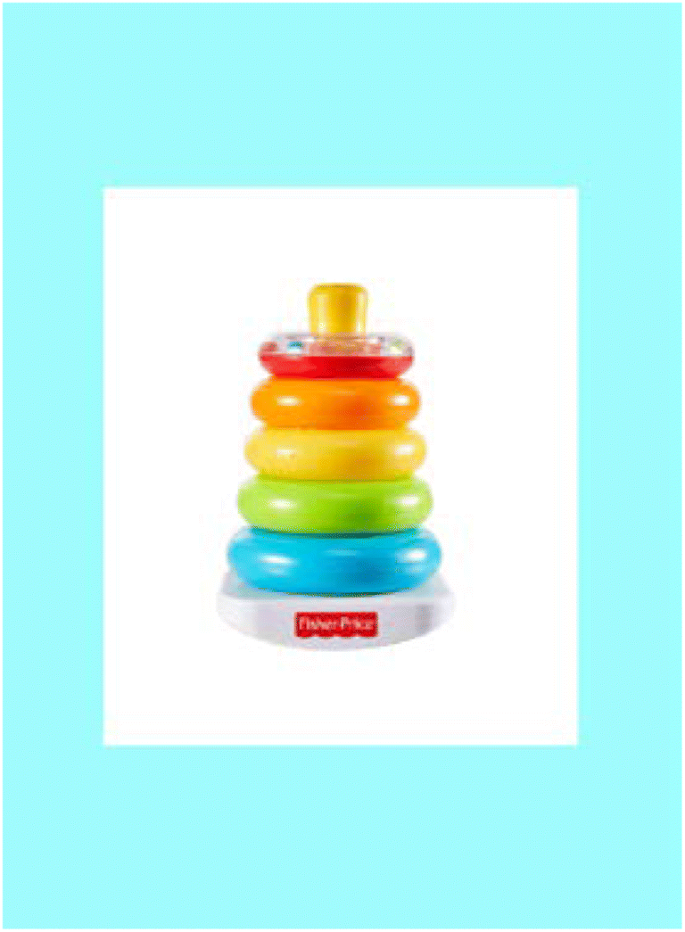
Close-ended activity page
Fig. 7 
Terminal reinforcer page
Fig. 8 
Insert Image icon


Creating Simple Navigation Between Slides
-
1.
Navigate to the cover page.
-
2.
Select the Shape tool (Fig. 9) and draw a large rectangle over the entire page.

Shape tool icon
-
3.
Right-click on the rectangle. Navigate to “Order,” then “Send Backward.” Now only the next arrow should be visible on the page.
-
4.
Select the next arrow and click the Insert Link icon (Fig. 10) in the toolbar. A white pop-up bar will appear on the screen. Click on “Slides in this presentation.” Select “Next Slide” and click “Apply.” This will now make it so clicking or pressing the next arrow during a presentation transitions to the next slide.
-
a.
Please note that the pop-up drop-down menu may run below the bottom of the browser page and may not be fully visible. In order to view all link options, resize the object or move to a higher location on the page. Perform the link operation and then return to the previous size and location.
-
a.
-
5.
Select the rectangle and navigate to the Insert Link icon (Fig. 10) in the toolbar. A white pop-up bar will appear on the screen. Click on “Slides in this presentation,” select the current slide number, and click “Apply.” This will disable all clicks or presses anywhere on the page other than a click on the arrow.
-
6.
Click on the large rectangle and then on the Color Fill and Border Color icons (Fig. 11). Change the color fill and border color to transparent.
-
7.
Copy the large rectangle from the cover page and paste on additional close-ended and terminal reinforcer pages.
-
8.
Then copy the “NEXT” arrow from the cover page and paste it on additional close-ended and terminal reinforcer pages.
-
9.
Completed close-ended slides can also be replicated using copy and paste. Links will continue to work.
-
a.
To edit the copied slides, select the large transparent rectangle and move it out of the way in order to edit or replace pictures. After editing, return the large transparent rectangle to its original position.
-
a.
-
10.
Go to the Present icon (Fig. 12), located in the top-right corner of the toolbar, to view and navigate through the slides.
-
a.
Navigate through the presentation by clicking on the “NEXT” arrows. They should advance you to the next slide in the sequence.
-
i.
If an arrow does not advance correctly, check the links by clicking on the arrow. When clicked on, each arrow should display a white link bar below with the words “Next Slide.” If the slide linked to the arrow is incorrect, click “Remove link” and return to Step 4 in the section “Creating Simple Navigation Between Slides.”
-
ii.
If there is no link, return to Step 4 in “Creating Simple Navigation Between Slides.”
-
i.
-
b.
After all arrow transitions are working correctly, restart the slideshow. Check that no other transitions occur when clicking elsewhere on the screen (anywhere other than the arrows).
-
i.
If transitions do occur, return to Step 5 in “Creating Simple Navigation Between Slides.”
-
i.
-
a.

Insert Link icon

Fill Color icon and Border Color icon

Present icon
Creating Choice Pages (Figure 13)
-
1.
Create a new blank page by clicking on the previous page in the left column and pressing the “Enter” key.
-
2.
Delete all text boxes.
-
3.
Select the Shape tool (Fig. 9) and draw a rectangle that completely covers the top half of the page.
-
4.
Click on the rectangle and change the color to a light gray using the Fill Color icon (Fig. 3).
-
5.
Select the Shape tool (Fig. 9) and draw a white rectangle in the lower half of the page, leaving a 0.5-in. colored margin around the edge.
-
6.
Draw one small white rectangle in the top half of the page.
-
7.
Copy the small rectangle and paste it three times.
-
8.
Arrange the four small rectangles in a 2 × 2 grid as shown in Fig. 13 using the red guide lines (Fig. 2).
-
9.
Create a red rectangle at the top of the page using the Shape tool (Fig. 9). Use the red guide lines (Fig. 2) to center it on the page.
-
10.
Select the Text Box icon (Fig. 14).

Choice page with four toy options

Text Box icon
-
11.
Resize the text box to fit within the red rectangle (leaving a red border around it) and center it using the red guide lines (Fig. 2).
-
12.
Click on the text box and type “CHOICE.”
-
13.
Center the text horizontally and vertically using the Align icon (Fig. 4).
-
14.
Click on the text box, click the Color Fill icon (Fig. 3), and select white to fill the text box with a white background.
-
15.
Select the “CHOICE” page in the left navigation bar.
-
16.
In the “File” menu, navigate to the “Download” section, and select “PNG image (.png, current slide)” (Fig. 15).

Downloading a .png file
-
17.
A “Save” page may appear, or the file may automatically download.
-
a.
If given the option to save, title the .png file as “Activity Schedule Template Choice Page,” select desired location, and click “Save.”
-
a.
-
18.
Select the “CHOICE” page in the left navigation bar, right-click, and select “Delete.”
-
19.
Create a new blank page by clicking on the previous page in the left column and pressing the “Enter” key.
-
20.
Select the new page and click on “Background” at the top of the navigation bar (Fig. 16).
-
21.
Select “Choose image.”
-
22.
Click the “Browse” button and select the “Activity Schedule Template Choice Page.png” or drag the .png file into the specified area.
-
23.
Click “Done.” This now makes a template for a choice page that cannot be edited or moved.
-
24.
Delete the blank text boxes on the page.
-
25.
Insert four toy pictures using the Insert Image icon (Fig. 8). Resize the pictures and place them into the four white rectangles in the top half of the page. After placing the pictures, the choice page should look like Fig. 13.
-
26.
Right-click the “CHOICE” page in the left navigation bar and copy the page.
-
27.
Right-click in the left navigation bar and paste the page four times. Now there should be five identical choice slides (Fig. 17).
-
28.
Select the second choice page in the left navigation bar.
-
29.
Right-click on one of the four pictures in the top four rectangles and copy it.
-
30.
Right-click on the page and paste it.
-
31.
Select the copied picture. Move it to the large white rectangle in the bottom half of the page and resize the picture using the blue squares (Fig. 2). The page should now look like the page displayed in Fig. 18.
-
32.
Repeat Steps 28–31 for the remaining three toys andpages.
Fig. 16 
Background button
Fig. 17 
Five identical slides in the left navigation bar
Fig. 18 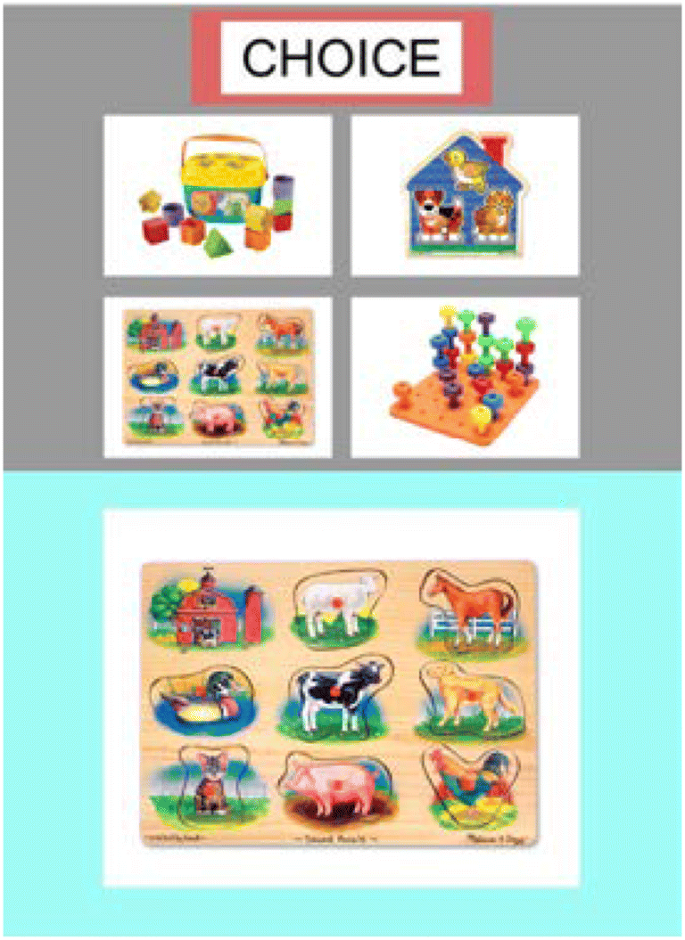
Choice page with four options and a puzzle selected


Creating Navigation for Choice Pages
-
1.
In the left navigation bar, navigate to the last choice page with a large picture in the lower rectangle (Fig. 18) and press the “Enter” key to create a blank page. Title this new slide “Blank.”
-
2.
Navigate to the first choice slide with an empty lower rectangle (Fig. 13). There should not be a “NEXT” arrow on this page.
-
3.
Draw a large rectangle over the entire page using the Shape tool (Fig. 9).
-
4.
Right-click on the rectangle. Navigate to “Order” and then select “Send to back.” Now only the four toy pictures should be visible on the page.
-
5.
Click on the large rectangle and navigate to the Insert Link icon (Fig. 10) in the toolbar. A white pop-up bar will appear on the screen. Click on “Slides in this presentation” and select the current slide number. Click “Apply.”
-
6.
Click on the large rectangle and then on the Color Fill and Border Color icons (Fig. 11). Change the color fill and border color to transparent.
-
7.
Right-click on the rectangle and copy it.
-
8.
Navigate to the remaining choice pages and paste the transparent rectangle on all four pages.
-
a.
To ensure correct navigation, click on the transparent rectangle on each subsequent choice page. The rectangle on each slide should display a white link bar on the lower left corner with the current slide number. If the slide linked to the rectangle is incorrect, click “Remove link.” Return to Step 5 in the section “Creating Navigation for Choice Pages.”
-
a.
-
9.
Navigate to the first choice slide with an empty lower rectangle (Fig. 13).
-
10.
Click on one toy picture and click on the Insert Link icon (Fig. 10) in the toolbar. A white pop-up bar will appear on the screen. Click on “Slides in this presentation” and select the corresponding slide number that has the identical toy picture enlarged in the lower half of the page. Click “Apply.”
-
11.
Repeat Step 10 for the remaining three toy pictures.
-
a.
To ensure correct navigation, click on each picture in the first choice slide. When clicked on, each picture should display a white link bar below with the corresponding slide number (see the flowchart in the Appendix, Fig. 30). If the slide linked to the small picture is incorrect, click “Remove link.” Return to Step 10 in the section “Creating Navigation for Choice Pages.”
-
a.
-
12.
Navigate to the “Student’s Name” page (on the cover of the presentation).
-
13.
Right-click on the “NEXT” arrow and copy it.
-
14.
In the left navigation bar, select the second choice page (the first slide with a large toy picture in the lower rectangle; Fig. 18) and paste the arrow.
-
15.
Select the “NEXT” arrow and click the Insert Link icon (Fig. 10) in the toolbar. A white pop-up bar will appear on the screen. Remove the previous link by clicking on the “X.” Click on “Slides in this presentation.” Select the “Blank” slide and click “Apply.” This will now make it so clicking or pressing the “NEXT” arrow during a presentation transitions to the next slide.
-
16.
Right-click on the “NEXT” arrow and copy it.
-
17.
Paste a copy of the arrow on the remaining three choice pages. Each of these pasted arrow’s navigation should automatically be linked to transition to the blank slide.
-
a.
To ensure correct navigation, click on the “NEXT” arrow on each subsequent choice page. When clicked on, each next arrow should display a white link bar below with the blank slide number. If the slide linked to the arrow is incorrect, click “Remove link.” Return to Step 15 in the section “Creating Navigation for Choice Pages.”
-
a.
-
18.
Go to the Present icon (Fig. 12), located in the top-right corner of the toolbar, to view and navigate through the choice slides.
-
a.
If there are errors with transitions from the initial choice slide to subsequent choice pages, refer to Step 11 in the section “Creating Navigation for Choice Pages.”
-
b.
If there are errors with the transition arrows on the subsequent choice pages, refer to Step 17 in the section “Creating Navigation for Choice Pages.”
-
c.
After all arrow and picture transitions are working correctly, restart the slideshow. Check that no other transitions occur when clicking elsewhere on the screen (anywhere other than the arrows and the first choice-page pictures). If transitions occur, return to Step 8 in “Creating Navigation for Choice Pages.”
-
a.
Three-Min Timed Activity Pages (Figure 19)
-
1.
Select the “Blank” slide. This is the final slide of the choice page sequence.
-
2.
Delete all text boxes on the page.
-
3.
Select the Shape tool (Fig. 9). Draw a long white rectangle and center it on the page (Fig. 20) using the red guide lines (Fig. 2).
-
4.
Import a picture (Fig. 5) of a timer that has both minute and start buttons (see the example image in the Appendix, Fig. 31). Place the timer image on the lower half of the page inside the white rectangle (Fig. 21).
-
5.
Select the Shape tool (Fig. 9) and draw one red circle. Pressing shift while drawing the circle will keep it perfectly round. Right-click on the circle, copy it, and paste it three times.
-
6.
Space all four circles evenly in the middle of the page (Fig. 22) using the red guide lines (Fig. 2).
-
7.
Select the fourth red circle. Select the Color Fill icon (Fig. 3) and change the color to green.
-
8.
Select the timer slide in the left navigation bar.
-
9.
In the “File” menu, navigate to the “Download” section, and select “PNG image (.png, current slide)” (Fig. 15).
-
10.
A “Save” page may appear, or the image may automatically download.
-
a.
If given the option to save, title the .png file as “Activity Schedule Template Three Minute Timer,” select the desired location, and click “Save.”
-
a.
-
11.
Note that you can create timer page templates with longer or shorter activity durations (e.g., 2 min, 4 min) by increasing or decreasing the number of red circles on the page. Copy the current slide to a new Google Slides document and save it as “Activity Schedule Timer Page Template.” This will allow you to edit and create other .png file timer pages.
-
a.
Click “File” and navigate to “Page setup” near the bottom of the list.
-
b.
Resize the page by clicking “Widescreen 16:9.” Select “Custom” and change the dimensions to 5.5 × 8.5 in. Click “Apply.”
-
c.
Navigate to the “Activity Schedule Template” slideshow.
-
a.
-
12.
Select the timer page in the left navigation bar. Select and delete all individual items on the page.
-
13.
Select the “Blank” page and click the “Background” button on the top navigation bar (Fig. 16).
-
14.
Select “Choose image.”
-
15.
Click the “Browse” button and select the “Activity Schedule Template Three Minute Timer.png” or drag the .png file into the specified area.
-
16.
Click “Done.” This now makes a template for a timer page that cannot be edited or moved.
-
17.
Click the Insert Image icon (Fig. 8), resize, and place a picture of an open-ended/timed activity on the page above the circles (as shown in Fig. 19).

Timer page

Long rectangle in the center of the page

Timer on the page

Circles on the page
Creating Navigation for a 3-Min Timer Page
-
1.
Draw a large rectangle over the entire page using the Shape tool (Fig. 9).
-
2.
Click on the large rectangle and navigate to the Insert Link icon (Fig. 10) in the toolbar. A white pop-up bar will appear on the screen. Click on “Slides in this presentation” and select the current slide number. Click “Apply.”
-
3.
Click on the large rectangle and then on the Color Fill and Border Color icons (Fig. 11). Change the color fill and border color to transparent.
-
4.
Create smaller dots (circles) on the corresponding timer buttons (Fig. 19).
-
a.
Select the Shape tool (Fig. 9) and draw one small button-sized red circle. (Pressing shift while drawing the circle will keep it perfectly round.) Right-click on the circle and then copy and paste it once. Use the Color Fill icon (Fig. 3) to change the second dot to green.
-
i.
Move the red dot on top of the timer’s minute button.
-
ii.
Move the green dot on top of the timer’s start button.
-
i.
-
a.
-
5.
Right-click the timer page in the left navigation bar and copy it.
-
6.
Paste four more timer pages into the left navigation bar (similar to Fig. 17).
-
7.
Create a new blank page by clicking on the previous page (the final timer page) in the left navigation bar and pressing the “Enter” key.
-
8.
Navigate to the first timer slide.
-
9.
Right-click on the green button dot. Navigate to “Order,” then “Send to back.”
-
10.
Select the red button dot. Navigate to the Insert Link icon (Fig. 10) in the toolbar. Click on “Slides in this presentation” and select “Next Slide.” Click “Apply.”
-
11.
Repeat Steps 9–10 for the next two timer slides.
-
12.
On the fourth timer slide, right-click on the red dot. Navigate to “Order,” then “Send to back.”
-
13.
Select the green button dot. Navigate to the Insert Link icon (Fig. 10) in the toolbar. Click on “Slides in this presentation” and select “Next Slide.” Click “Apply.”
-
14.
Navigate back to the second timer slide. Select the Text Box icon (Fig. 14), create a text box, and type “1:00.” Place the time text box over the timer screen. Adjust the text box size, font size, and color fill as needed.
-
15.
Select the text box with “1:00.” Copy the text box and paste it into the remaining timer pages. Edit the text boxes on each subsequent timer page to increase the time shown by 1 min (Fig. 23). Edit the timer text boxes on the fourth and fifth timer pages to both say “3:00.”
-
16.
After copying and editing the text boxes, right-click the timer text box on each page and click “Order,” then “Send to back.”
-
17.
Select the fifth timer slide in the left navigation bar.
-
18.
Click on the “Insert” menu (Fig. 24) and select “Video.”
-
19.
A YouTube search bar will appear. Type in “3 minute timer.” Choose the timer and click the “Select” button.
-
20.
A “Format options” bar will appear on the right when the video is inserted. Select “Autoplay when presenting,” as seen in Fig. 25.
-
21.
Select the “NEXT” arrow from the cover page of the presentation (with “Student’s Name”). Copy and paste the arrow in the bottom right of the video page (Fig. 26).
-
22.
After the timer video page, create a blank slide to continue making the schedule.
-
a.
To finish the schedule, see the section “Creating a New Schedule/Modifying the Schedule Template.”
-
a.
-
23.
Go to the Present icon (Fig. 12), located in the top-right corner of the toolbar, to view and navigate through the timed activity slides.
-
a.
Navigate through the presentation by clicking on the timer dots in sequence and the “NEXT” arrow. Each click should advance to the next slide in the sequence.
-
i.
If the slides do not advance correctly, check the links by clicking on the linked object. When clicked on, each linked object should display a white link bar below with the words “Next Slide.” If the slide linked to the object is incorrect (or missing), click “Remove link” and return to the step corresponding to the specific object:
-
1)
Red dot: Step 10 in the section “Creating Navigation for a 3-Min Timer Page”
-
2)
Green dot: Step 13 in the section “Creating Navigation for a 3-Min Timer Page”
-
3)
Next arrow: Step 21 in the section “Creating Navigation for a 3-Min Timer Page”
-
1)
-
i.
-
b.
After all transitions are working correctly in sequence, restart the slideshow. Check that no other transitions occur when clicking elsewhere on the screen (anywhere other than the linked objects).
-
i.
If transitions occur, check the following:
-
1)
Ensure that the transparent rectangle is linked correctly. If it is not, return to Step 2 in the section “Creating Navigation for a 3-Min Timer Page.”
-
2)
If an incorrect object is creating a transition, exit the slideshow and navigate to the slide with that object. Right-click on the object, select “Order,” and then “Send to back.”
-
1)
-
i.
-
a.

Timers with the time on the screen

Insert icon

Video format options with autoplay when presenting an option

“NEXT” arrow on the video page
Creating a New Schedule/Modifying the Schedule Template
To create a new schedule, copy and paste the template slide sets into a new Google Slides presentation. The template sequences will maintain links and other properties. For example, to create one choice activity, copy all five slides of the choice page. This task analysis will assist in creating a template that clinicians can then use to create client-specific schedules. Each schedule should end with a terminal reinforcer that is linked to a blank page, signaling the end of the schedule (see the Appendix, Fig. 30). To replace pictures in any of the pages, select the large transparent rectangle and move it out of the way. Then edit or replace pictures and place the large transparent rectangle back in place. To test and ensure all pages and features are working correctly, we suggest selecting the Present icon (Fig. 12) to navigate and interact with the slides as the client would to check for errors. To assist with following the activity schedule template sequence, we provide a flowchart example in the Appendix, Fig. 30.
Sharing Schedules With Families and Clients
There are various options for sharing activity schedule files with caregivers and clients. One way is to send the caregivers a link to the activity schedule file. To create a link, select the yellow “Share” button (Fig. 27) in the top-right corner. A pop-up menu will appear that provides sharing options, including view-only or editable access. Select “Get shareable link” and then e-mail this link to the family/client. Other examples of how to share the activity schedule include creating a Google Drive folder with multiple schedule variations or sharing it with other instructional materials using Google Classroom. For all sharing options, learners will need to view the activity schedules in the Present form or the slideshow view. To access the presentation on mobile devices or tablets, they will need to download the Google Slides app.

Share button
Discussion
Researchers have demonstrated that photographic activity schedules can be an effective tool to promote independence and reduce the need for adult prompts across a variety of behaviors and for many different types of learners. Whereas much of this body of research has investigated the use of binder-based or single-page paper activity schedules, in recent years, researchers have demonstrated that technology-based digital schedules can also be effective and, in some circumstances, preferred by learners (Giles & Markham, 2017). Digital activity schedules have multiple potential advantages that make them well suited to situations such as the current COVID-19 crisis, during which face-to-face contact between behavior analysts and their clients and families may be reduced or eliminated. Another possible advantage includes the relative ease with which they can be modified and the potential for behavior analysts to create and disseminate digital activity schedules electronically. The task analysis included in this article may be a useful tool as behavior analysts create and disseminate digital activity schedules.
References
Akers, J. S., Higbee, T. S., Gerencser, K. R., & Pellegrino, A. J. (2018). An evaluation of group activity schedules to promote social play in children with autism. Journal of Applied Behavior Analysis, 51, 553–570. https://doi.org/10.1002/jaba.474.
Betz, A., Higbee, T. S., & Reagon, K. A. (2008). Using joint activity schedules to promote peer engagement in preschoolers with autism. Journal of Applied Behavior Analysis, 41, 237–241. https://doi.org/10.1901/jaba.2008.41-237.
Brodhead, M. T., Higbee, T. S., Pollard, J. S., Akers, J. S., & Gerencser, K. R. (2014). The use of linked activity schedules to teach children with autism to play hide-and-seek. Journal of Applied Behavior Analysis, 47, 645–650. https://doi.org/10.1002/jaba.145.
Carlile, K. A., Reeve, S. A., Reeve, K. F., & DeBar, R. M. (2013). Using activity schedules on the iPod touch to teach leisure skills to children with autism. Education and Treatment of Children, 36(2), 33–57. https://doi.org/10.1353/etc.2013.0015.
Carson, K. D., Gast, D. L., & Ayres, K. M. (2008). Effects of a photo activity schedule book on independent task changes by students with intellectual disabilities in community job sites. European Journal of Special Needs Education, 23, 269–279. https://doi.org/10.1080/08856250802130475.
Dauphin, M., Kinney, E. M., & Stromer, R. (2004). Using video-enhanced activity schedules and matrix training to teach sociodramatic play to a child with autism. Journal of Positive Behavior Interventions, 6, 238–250. https://doi.org/10.1177/10983007040060040501.
Gerencser, K. R., Higbee, T. S., Akers, J. S., & Contreras, B. P. (2017). Evaluation of interactive computerized training to implement photographic activity schedules with children with autism spectrum disorder. Journal of Applied Behavior Analysis, 50, 567–581. https://doi.org/10.1002/jaba.386.
Giles, A., & Markham, V. (2017). Comparing book- and tablet-based picture activity schedules: Acquisition and preference. Behavior Modification, 41, 647–664. https://doi.org/10.1177/0145445517700817.
Gourwitz, J. R. (2014). IPads for students with ASD: Comparing delivery modes for visual activity schedule (Doctoral dissertation, University of Central Florida). Retrieved from http://etd.fcla.edu/CF/CFE0005339/Gourwitz_Jillian_R_201408_PhD.pdf
Higbee, T. S., & Brodhead, M. T. (2016). Promoting independence, verbal behavior, and social skills in individuals with autism through activity schedules and script fading. International Journal of Behavior Analysis and Autism Spectrum Disorders, 1, 1–8.
Higbee, T. S., & Sellers, T. P. (2017). Visual learning strategies to promote independence and appropriate social behavior. In J. B. Leaf (Ed.), Handbook of social skills and autism spectrum disorder: Assessment, curricula, and interventions (pp. 241–256). Cham, Switzerland: Springer.
MacDuff, G. S., Krantz, P. J., & McClannahan, L. E. (1993). Teaching children with autism to use photographic activity schedules: Maintenance and generalization of complex response chains. Journal of Applied Behavior Analysis, 26, 89–97. https://doi.org/10.1901/jaba.1993.26-89.
McClannahan, L. E., & Krantz, P. J. (1999). Activity schedules for children with autism: Teaching independent behavior. Bethesda, MD: Woodbine House.
Rehfeldt, R. A., Kinney, E. M., Root, S., & Stromer, R. (2004). Creating activity schedules using Microsoft® PowerPoint®. Journal of Applied Behavior Analysis, 37(1), 115–128. https://doi.org/10.1901/jaba.2004.37-115.
Author information
Authors and Affiliations
Corresponding author
Ethics declarations
Conflict of Interest
The authors have no known conflicts of interest to disclose.
Informed Consent
As this is a technical article, no human participants were involved in the project. Thus, no informed consent was necessary.
Additional information
Editor’s Note
This manuscript is being published on a highly expedited basis, as part of a series of emergency publications designed to help practitioners of applied behavior analysis take immediate action to adjust to and mitigate the COVID-19 crisis. This article was submitted on April 3, 2020, and received final acceptance on April 6, 2020. The journal would like to especially thank Dr. Thomas Szabo for his expeditious review of the manuscript. The views and strategies suggested by the articles in this series do not represent the positions of the Association for Behavior Analysis International or Springer Nature.
Publisher’s Note
Springer Nature remains neutral with regard to jurisdictional claims in published maps and institutional affiliations.
Appendix
Appendix

Example of an activity schedule data sheet

Example of an activity schedule data sheet

Activity schedule template flowchart

Sample timer images to use
Rights and permissions
About this article

Cite this article
Reinert, K.S., Higbee, T.S. & Nix, L.D. Creating Digital Activity Schedules to Promote Independence and Engagement. Behav Analysis Practice 13, 577–595 (2020). https://doi.org/10.1007/s40617-020-00437-8
Published:
Issue Date:
DOI: https://doi.org/10.1007/s40617-020-00437-8